As you probably already know, removing the Exchange 2003 Server from your domain
requires you to local with administrative rights and use the “Add or Remove
Programs” feature within the “Control Panel”. As a reminder, the steps are as
follows.
- Bootup the old Exchange Server and login.
- Open Control Panel | Add or Remove Programs.
- Click the “Change or Remove Programs” icon on your left.
- Highlight the Microsoft Exchange Server line, it expands.
- Click the Remove button.
- Confirm the dialog box by clicking Yes.
- Wait for the uninstall to complete.
- Reboot or shutdown the server, whichever you prefer.
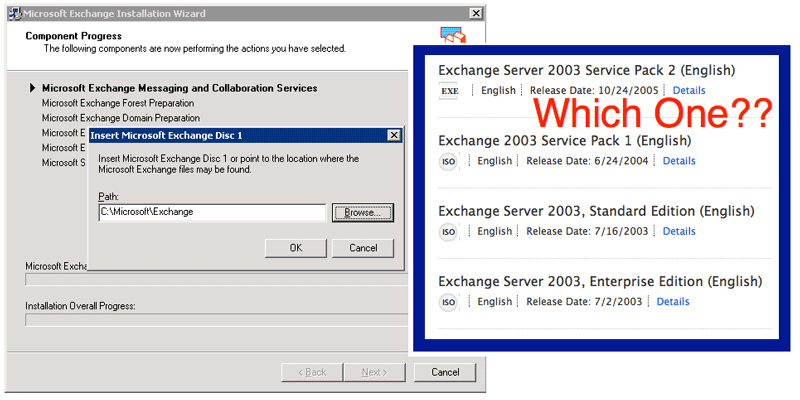
However, when you attempt this, you get an aggravating error message, which says
“Insert Microsoft Exchange Disc 1 or point to the location where the Microsoft
Exchange files may be found.” How to you proceed? Obviously, you need to
either find the original 2003 discs or download the software from your MSDN
account. But, when logged into the Microsoft account, you see there are four
different versions of 2003. All will identically remove the existing 2003
installation, right?
My experience is that the four different versions will not identically
decommission your email server. You might think that it depends upon (a) what
software version was originally installed or (b) what software version is
currently installed. But, for me, neither of these approaches functioned.
Specifically, my customer had originally installed Exchange 2003 SP1 and had
later upgraded to Exchange 2003 SP2. Neither disc would uninstall Exchange
2003. With either service pack, the error message now said “Setup failed while
installing sub-component Microsoft Windows Active Directory schema update with
error code DxC1037986 (please consult the installation logs for a detailed
description). You may cancel the installation or try the fail step again.”
The resolution was to uninstall again, but use the version “Exchange Server
2003, Enterprise Edition” without the service packs.
