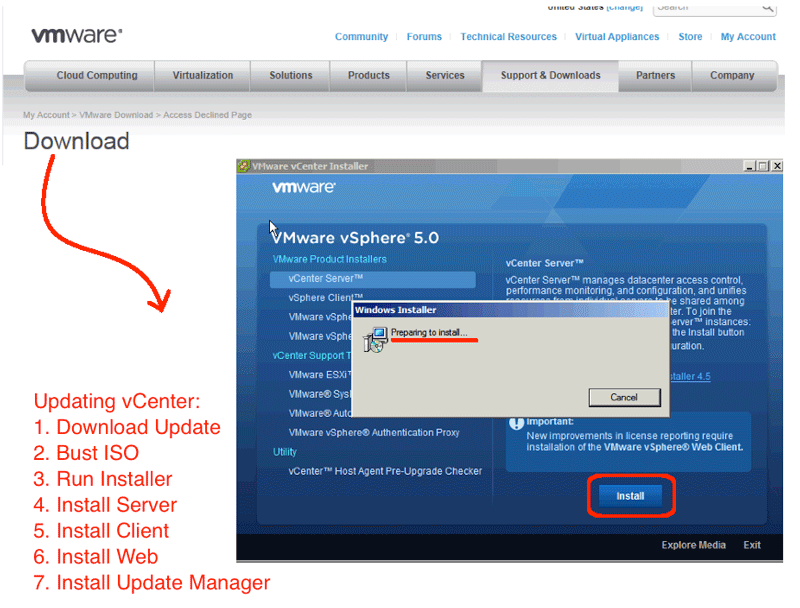
As many of you are probably aware, VMware 5.0 Update 1 was released on March 15th, 2012. I have had an opportunity to patch my ESXi 5.0 hosts and update the vCenter Server. This blog post contains the steps used to update the vCenter Server.
Before you begin, gather the credentials you will need in order to perform the update. You will need the following:
(a) Credentials for your VMware website login.
(b) Network credentials for your vSphere vCenter server.
(c) Database credentials to your vCenter database.
(d) Credentials for your service account used to run your vCenter web server.
(e) Database credentials to your vCenter Update Manager database.
(f) Administrative login to your vSphere vCenter client.
You will need to use an active VMware login that has an associated vCenter Server license. To download the appropriate patches, goto the following: http://downloads.vmware.com/d/info/datacenter_cloud_infrastructure/vmware_vsphere/5_0 and then click the download button beside “VMware vCenter Server 5.0 Update 1 and modules”.
- Download the update:
- Download the ISO image from the vmware website.
(Note: you will need credentials describe in (a) above). - Save the ISO image to your vCenter server.
- Download the ISO image from the vmware website.
- Bust the ISO:
- Login to your vCenter Server.
(Note: you will need credentials describe in (b) above). - Use a software tool list to either bust the ISO or attach the ISO as a virtual DVD drive.
(note: I used Magic ISO to attach the ISO)
- Login to your vCenter Server.
- Run the Installer:
- Run autorun.exe in the downloaded ISO image.
- The VMware vCenter Installer dialog appears (see screen shot).
(Note: at this stage, this is identical to installing vCenter for the first time…)
- Install vCenter Server:
- Highlight “vCenter Server” and click the Install button.
- Once the install wizard loads, it will confirm that it is performing an upgrade, and not a new install.
- Follow the prompts.
(Note: you will need credentials describe in (c) above).
- Install vCenter Client:
- Highlight “vCenter Client” and click the Install button.
- Follow the prompts.
- Install Web components:
- Do this only if you want the web server installed!
- Highlight “vSphere Web Client (Server)” and click the Install button.
- Follow the prompts.
(Note: you will need credentials describe in (d) above).
- Install the Update Manager:
- Do this only if you want Update Manager (recommended).
- Highlight “VMware vSphere Update Manager” and click the Install button.
- When prompted, leave the default of updating the existing database, and do not overwrite a fresh copy.
- Follow the prompts.
(Note: you will need credentials describe in (e) above).
- Test your connectivity:
- Reboot the vCenter server.
- Login to the vCenter server.
- Use Control Panel | Administrative Tools | Services to validate the VMware* services have started.
- Use the vSphere client to connect to the vCenter server.
(Note: you will need credentials describe in (f) above).
So, my upgrade from VMware vCenter 5.0 to VMware vCenter 5.0 Update 1 went flawlessly. I validated that the vCenter software was actually updated by using the About file menu item in the vSphere client to see that the version was now reporting “Build 623373”.
